How to Install WordPress Plugins


The first thing every beginner should learn after installing WordPress is how to install a WordPress plugin.
WordPress plugins are similar to apps for your WordPress website. They enable you to add new WordPress features like as a contact form, slideshow, shopping cart, and more.
WordPress has thousands of free and paid plugins available. We will show you how to install a WordPress plugin step by step in this post.
How to Install a WordPress Plugin:
Install a Plugin using WordPress Plugin Search
Using the plugin search is the simplest approach to install a WordPress plugin. The sole disadvantage of this method is that a plugin must be in the WordPress plugin directory, which is restricted to free plugins.
The first step is to navigate to the Plugins » Add New page inside your WordPress admin area.
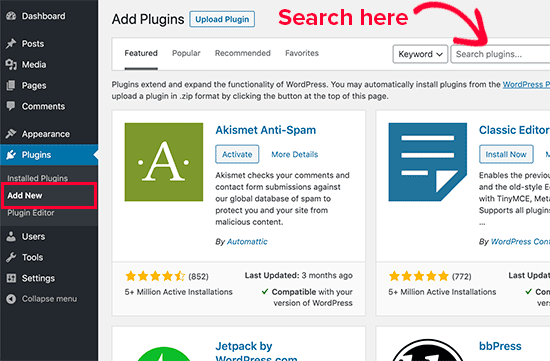
You will see a screen similar to the one seen in the screenshot above. Enter the plugin name or the feature you're looking for to find it. Following that, you will see a slew of listings, such as the one below:

You can pick the plugin that is best for you. Since in our search, we were looking for WPForms which is the best WordPress contact form plugin, we’ll click the ‘Install Now’ button next to it.
WordPress will now download and install the plugin for you. After this, you’ll notice the ‘Install Now’ button will change into the ‘Activate’ button.
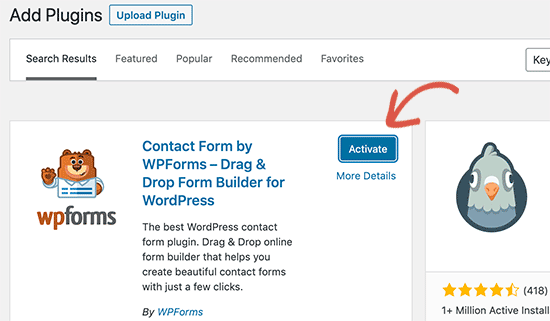
A WordPress plugin can be installed on your site, but it will not function unless it is activated. So, go ahead and activate the plugin on your WordPress site by clicking the activate button.
That's all there is to it; you've successfully installed your first WordPress plugin.
The plugin settings must now be configured. These options will differ depending on the plugin, therefore we won't go over them in this tutorial.
Install a Plugin using the WordPress Admin Plugin Upload
The WordPress plugin directory does not include any paid WordPress plugins. The first technique will not allow you to install these plugins.
That is why WordPress includes an upload option for installing such plugins. We'll show you how to install WordPress plugins in the admin area by using the upload option.
First, you must obtain the plugin from its official website (which will be a zip file). Then, go to the WordPress admin area and navigate to the Plugins > Add New page.
Then, at the top of the page, click the 'Upload Plugin' button.

The plugin upload form will be displayed as a result. Click the 'Choose File' option and navigate to the plugin file you downloaded earlier to your computer.
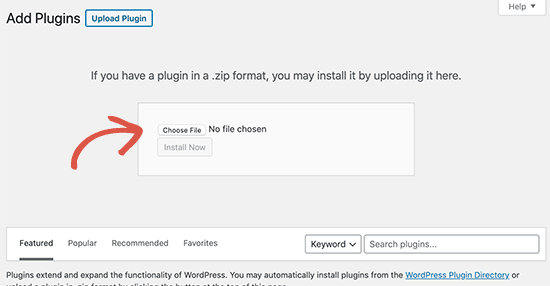
After you've chosen the file, you must click the 'Install Now' button.
WordPress will now upload and install the plugin file from your PC. After the installation is complete, you will get a success message similar to this.
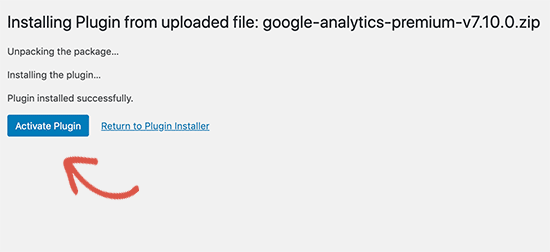
Once installed, click the Activate Plugin link to begin using the plugin.
You'd have to tweak the parameters to suit your needs. These options will differ depending on the plugin, therefore we won't go over them in this tutorial.
Manually Install a WordPress Plugin using FTP
In rare situations, your WordPress hosting provider's file restrictions may prevent you from installing a plugin from the admin area.
In this case, manually installing the plugin over FTP is your best bet.
The FTP management method is the least user-friendly.
You must first obtain the plugin's source code (it will be a zip file). The zip file must then be extracted on your computer.
When you extract the plugin zip file, a new folder with the same name is created. This is the folder you must manually upload to your website using an FTP program.
You would need to connect to your host using the FTP manager. If you don't remember your FTP login or password, contact your WordPress hosting provider and ask.
Connect to your website using the login credentials provided by your web provider by opening the FTP program on your computer. Once connected, navigate to your website's /wp-content/plugins/ folder.
Then, on your web server, upload the folder you extracted from the zip file to the /wp-content/plugins/ folder.
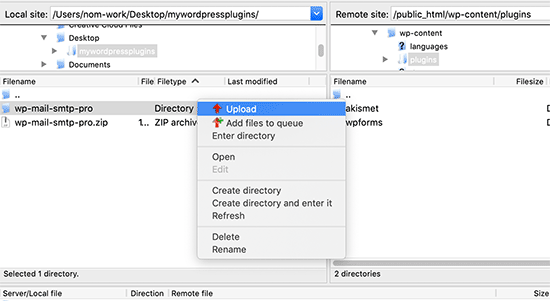
After you've uploaded the files, go to the WordPress admin area and click the Plugins option in the admin menu. On the plugins page, you'll see that your plugin has been successfully installed.
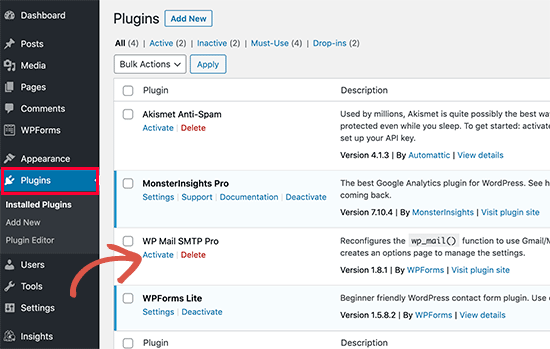
To use the plugin, click the Activate button located beneath it.
You may need to configure the plugin settings after activating it. WordPress plugins have their own settings that vary from one plugin to the next, therefore we won't go over them here.