How to Install a WordPress Theme


There are dozens of WordPress themes to choose from (both free and paid). As a newbie, you may want to test a couple of them on your site until you find the one that works best for you.
In this beginner's guide, we'll go through how to install a WordPress theme in detail, step by step. We'll go over three different methods for installing a WordPress theme so you can pick the one that works best for you.
Installing a WordPress theme is simple, but keep in mind that activating a new theme will alter the appearance and functionality of your website.
If you're changing from an existing theme, you might want to check out our checklist of things to do before changing WordPress themes.
If you are installing a WordPress theme on a new site, then you are good to go.
Install a Theme using WordPress Admin Theme Search
The simplest way to install a free WordPress theme from the WordPress.org themes directory is to use the built-in theme search tool.
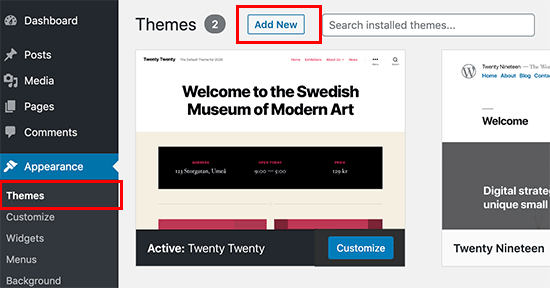
The first step is to log in to your WordPress admin area. Then, navigate to the Appearance » Themes tab and press the Add New button.
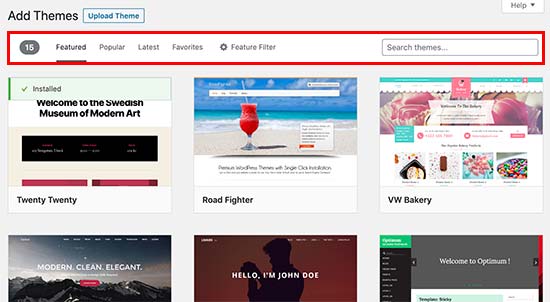
On the following screen, you can choose from Featured WordPress themes, Popular WordPress themes, Latest WordPress themes, search for a specific theme, or search for themes with specific features.
By using the 'Feature Filter' button, you can sort themes depending on their features. You can, for example, sort themes by subject, special features, and layout.
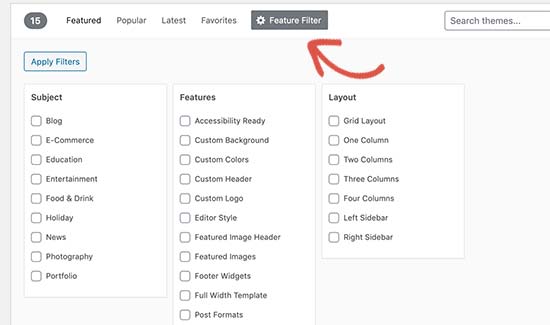
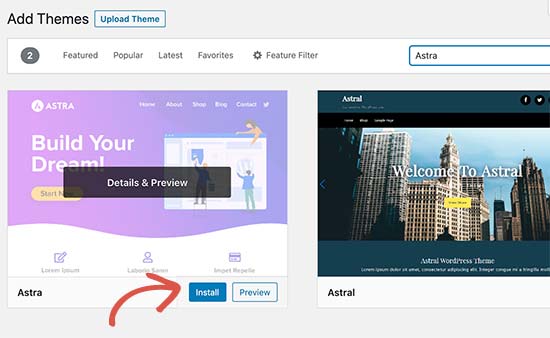
You will get a list of themes that met your requirements based on your search. In our situation, we looked for the well-known Astra motif.
When you find the theme you wish to install, simply place your mouse over the image. This will expose the install, preview, and details buttons.
Proceed to install by clicking the install button.
WordPress will now install your theme and display a success message as well as 'Activate' and 'Live preview' buttons.

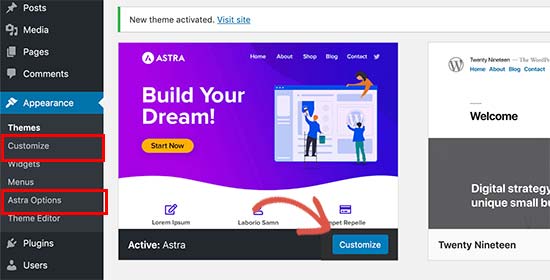
After clicking the activate button, your WordPress theme has been successfully installed and activated.
Depending on the theme, it may include additional settings choices that must be configured.
For example, your theme may request that you install recommended plugins, download demo data, or check settings.
To begin configuring your theme, either follow the on-screen instructions or click the customize option.
Install a Theme by using the Upload Method from WordPress Admin
The first technique we discussed only allows you to install free themes from the WordPress.org theme directory.
What if you wish to install a premium WordPress theme from a company such as StudioPress, Elegant Themes, Themify, or others?
What if you wish to use a different theme? In this scenario, you'll need to install the theme through your WordPress admin using the upload option.
Begin by downloading the.zip file of the theme you bought from a marketplace or a commercial theme shop.
Then, in the WordPress admin area, navigate to the Appearance » Themes page and select the Add New button at the top.
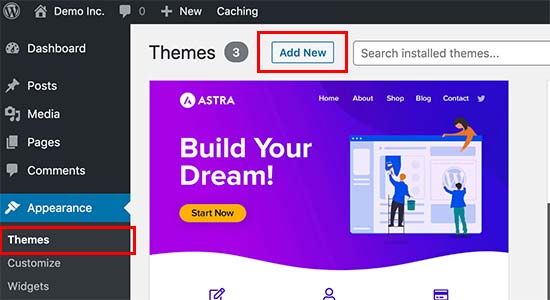
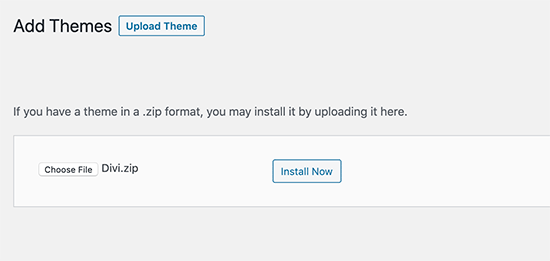
This will lead you to the add new theme page, which will show you the highlighted free themes. Since you already have the theme you wish to install, proceed to the top and select the 'Upload Theme' button.
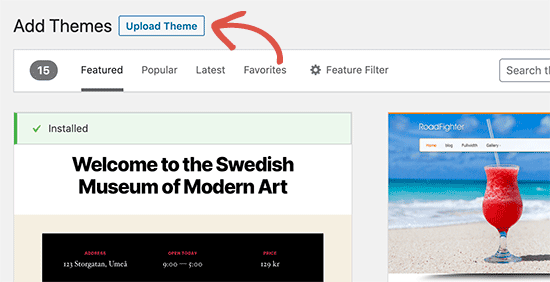
You will be prompted to select the zip file that you already downloaded. Choose the file and press the Install Now button.
Once your theme has been installed, you will get a success message with a link to Activate and preview it.
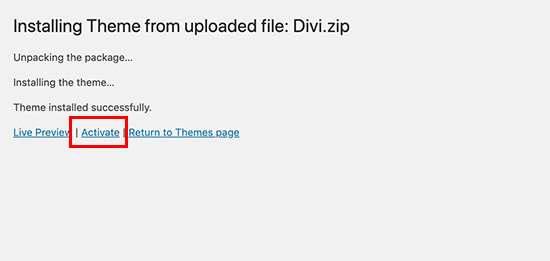
You've successfully installed and activated your WordPress theme by clicking the 'Activate' link.
Depending on the theme, it may include additional settings choices that you must change via the theme customizer or a separate options panel.
Note: The theme upload functionality is only available for self-hosted WordPress.org users. If you’re using WordPress.com, then you will not see this option because it limits you.
Installing a WordPress Theme using FTP
If you're feeling daring and want to take your knowledge to the next level, you can learn how to install WordPress themes using FTP.
Remember that this is not for complete novices because it is little more sophisticated.
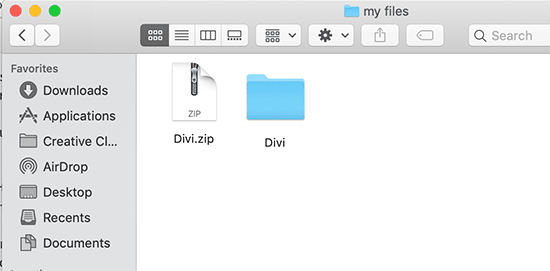
To begin, download the theme zip file to your computer. Following that, you must unzip the file.
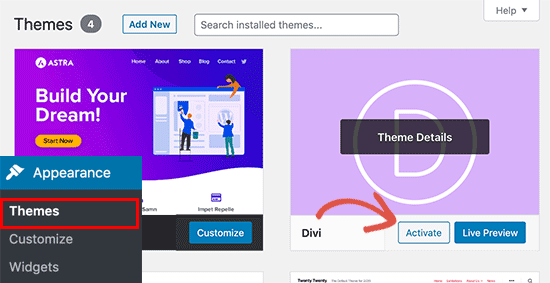
This will create a new folder on your computer with the theme's name. We obtained the well-known Divi premium theme.
Now that you've obtained the theme files, you can upload them to your website.
To do so, use an FTP client to connect to your website's / WordPress hosting account. If you require assistance, please visit our instruction on how to use FTP to upload WordPress files.
Once connected, navigate to the /wp-content/themes/ folder. Inside, you'll see folders for all of the themes that are currently installed on your website.
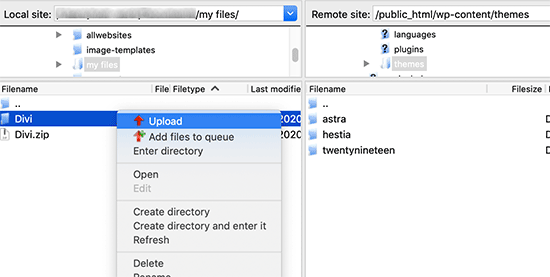
Choose your unzipped theme folder from your PC and upload it to your website.
After you've uploaded the theme, navigate to your admin section and select Appearance » Themes.
There should be a listing for the theme you uploaded. Simply place your mouse over the theme and click the activate button.