How to fix error establishing a database connection in WordPress

If you run a WordPress site most likely you have already met with the dreaded “Error Establishing a Database Connection” error message. Your site content has completely gone and displayed nothing else but a blank page with the message. Although “Error Establishing a Database Connection” can be caused by different reasons and it takes some time to investigate the problem, it’s a more or less routine WordPress management task.
WHAT “ERROR ESTABLISHING A DATABASE CONNECTION” EXACTLY MEANS
In short, this type of error means that, for some reason, WordPress couldn’t connect to the database. Your database holds your content except for the images and media files that reside in the wp-content folder inside the public_html directory on your server.
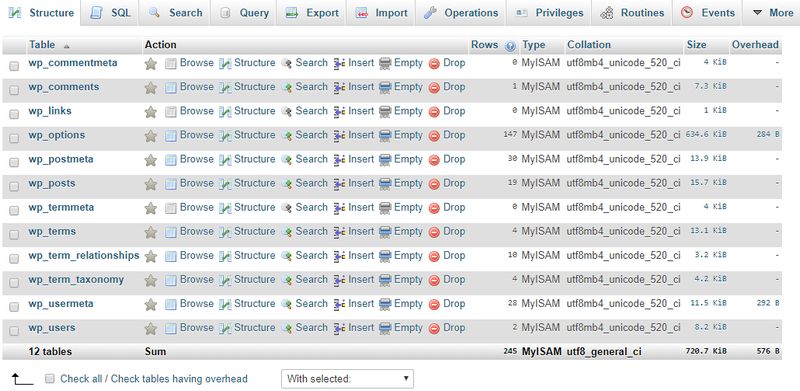
WordPress uses MySQL as database management system. Your MySQL database has different tables inside, such as wp_users to store user data and wp_posts to store your posts. The default WordPress install comes with 12 database tables, however plugins can also add extra tables to the database.
When you encounter the “Error Establishing a Database Connection” error, you need to investigate the reason why your WordPress install can’t connect to the database.
1. BACK UP YOUR DATABASE
As a rule of thumb, before you start to work with your database, always back it up properly. In case anything happens you can move back to the previous version. However, as you can’t access your admin area right now, you can’t use backup plugins either, which would be the best solution otherwise.
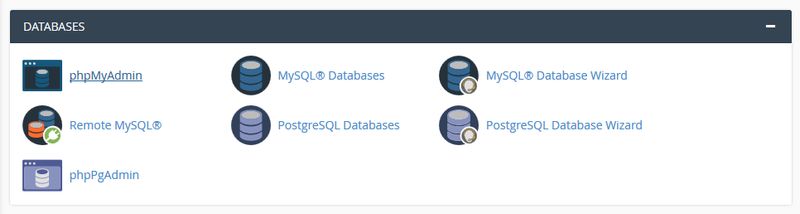
Luckily, hosting providers also have database backup options that are available from the cPanel and you can still use when your website is down. On the image below, you can see how typical database backup options look like in the cPanel, however different hosting providers can slightly differ in the solutions they offer.
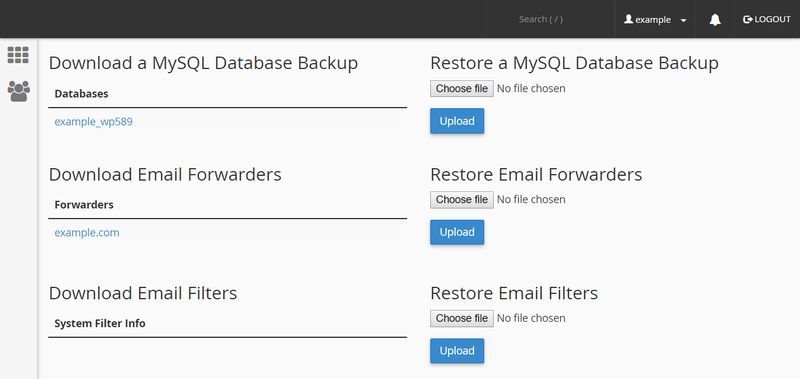
Choose the database backup option you find the best, just pay attention that you back up the whole database. Then, you can start investigating the problem.
2. TEST IF YOUR DATABASE IS CORRUPTED
It’s really fast to find out if your database is corrupted, so it’s reasonable to start the investigation with this test. You need to check if the front-end and back-end of your site return the same “Error Establishing a Database Connection” error.
The front-end is the homepage of your website that visitors see. Unless you use a subdirectory for your WordPress install, it’s your root URL, for instance http://www.example.com. The backend is the admin area that you can reach using the http://www.example.com/wp-admin URL. (Replace “example.com” with your own domain.)
If both the front-end and back-end return the same error message then your database is not corrupted and you can move on to the next step. However, if you get different messages, for instance one that says “One or more database tables are unavailable…”, you have found the cause of the error. Your database is corrupted and you need to fix it.
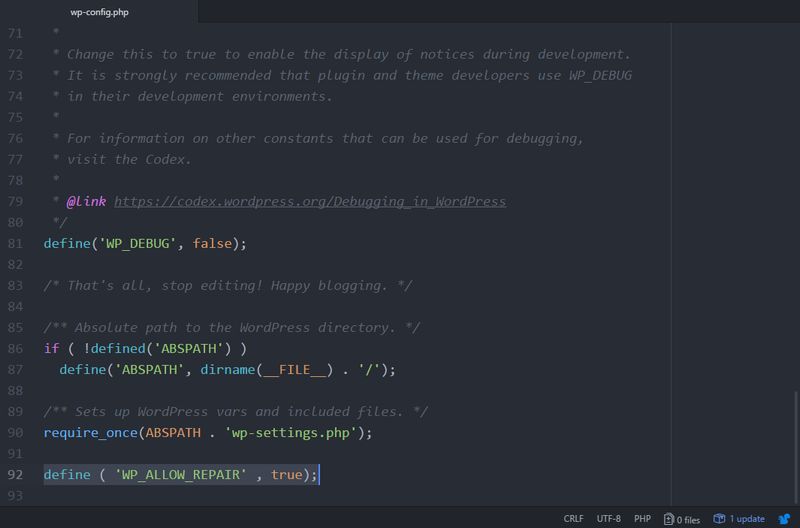
Luckily, WordPress has a built-in database repair option you can activate through your wp-config.php file. Access the file using either your cPanel’s File Manager or an FTP client such as FileZilla Client. You can find wp-config.php in the public_html folder. Then, open the wp-config.php file and add the following line to the bottom of the file:
define ( 'WP_ALLOW_REPAIR' , true);
It’s important to place the code into the last line of the file, otherwise the database repair won’t be properly executed:
Then, navigate to the http://www.example.com/wp-admin/maint/repair.php URL where now you will find the following database repair page:

Click the “Repair Database” button and simply wait for WordPress to fix your corrupted database. As this repair screen is available by anyone on the web, don’t forget to delete the snippet from your wp-config.php file when the process is done.
3. CHECK YOUR LOGIN CREDENTIALS
Wrong database login credentials also frequently prevent WordPress from connecting to the database. The name, hostname, username, and password of your database are stored in the wp_config.php file. This data need to be exactly the same in the wp-config.php file and in the database.
Note that your database username and password are not the same as the username and password you use to log in to your WordPress admin area. Even if you think you haven’t changed your database credentials, something could still have happened on the host’s end. So, you need to compare the login credentials in the database and in the wp-config.php file.
Connect to your server with an FTP program and download the wp-config.php file. Alternatively, you can also edit the file in your cPanel’s File Manager. Open wp-config in a code editor and find the database login credentials among the MySQL settings.

You need to check four constants:
- DB_NAME
- DB_USER
- DB_PASSWORD
- DB_HOST
The first one, DB_NAME is the easiest to check. In your cPanel, find phpMyAdmin in the Databases section and log in to the program.
You can find the database name in the left column. On the image below, the database name is wptest. This has to be the same as the value of the DB_NAME constant in the wp-config file.
If you have more than one databases and don’t know which one to choose click the wp_options table in the database and find the siteurl option (it’s usually the first option). Here, you can check if the database belongs to the URL you need.
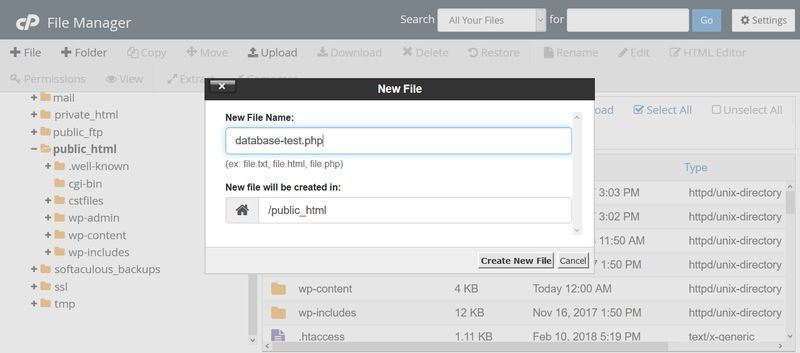
To check DB_USER and DB_PASSWORD on your server, you need to create a new PHP file in your public_html folder and add a short code snippet that checks if WordPress can really access the database using the username and password you have in the wp-config file.
You can name the new file anything you want, but it must have a .php extension. The example below uses the database-test.php name. You can create and edit the new file in your cPanel’s File Manager or create a file in your code editor and upload it via FTP to your server.
You need to use the following code snippet:
<?php $db = mysqli_connect('DB_HOST', 'DB_USER', 'DB_PASSWORD'); if (!$db) { die('Could not connect to the database.' . mysqli_error()); } echo 'Connected successfully to the database.'; mysqli_close($db);
Inside the mysqli_connect() function, you need to change ‘DB_HOST’, ‘DB_USER’, and ‘DB_PASSWORD’ to their respective values in the wp-config file. In our wp-config example above, these are ‘localhost’, ‘root’, and ‘xxxx’ (see the screenshot above for reference). So in that case, the second line will be:
$db = mysqli_connect('localhost', 'root', 'xxxx');
After you uploaded the file to your server, enter the http://www.example.com/database-test.php URL in your browser’s address bar and run the PHP script. If it returns the ‘Connected successfully to the database’ message your login credentials are valid and you can move on to the next step.
If it returns the ‘Could not connect to the database’ message your login credentials in the wp-config and the database don’t match. As you can’t change the database username and password directly in the cPanel (for security reasons), you need to create a new database user.
To create a new database user, click the Databases > MySQL Databases menu on your cPanel’s home screen. On the MySQL Databases page, scroll down to the MySQL Users section.
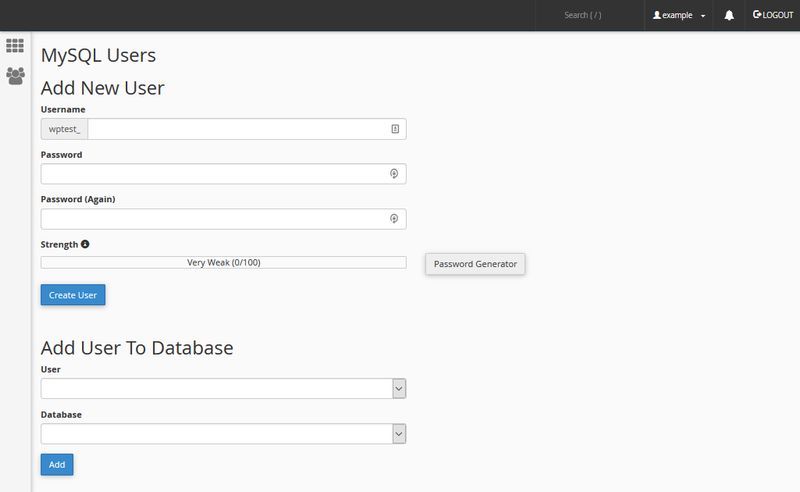
Create a new user and copy-paste the new database username and password into the wp-config file. From now on, your WordPress install will connect to the MySQL database with the new user.
So, your DB_NAME, DB_USER, and DB_PASSWORD constants are all correct now. It can still happen that your hosting provider has changed the DB_HOST without notifying you, however it’s quite unlikely. There’s a list in the WordPress Codex in which you can check the DB_HOST values for larger hosting providers. If you don’t find yours in the list you can contact your host by live chat and ask them about the DB_HOST value they use.
4. SCAN CORRUPTED WORDPRESS FILES
“Error Establishing a Database Connection” can be also caused by corrupted files in your WordPress install. WordPress core files don’t reside in the MySQL database but in the public_html folder on your server.
Normally, you could simply run a scan with a security plugin such as Wordfence that checks all your WordPress files against the official ones. However, this is not an option now, as you can’t access your admin area. Therefore, you need to download and install a fresh copy of the WordPress core from the official repo.
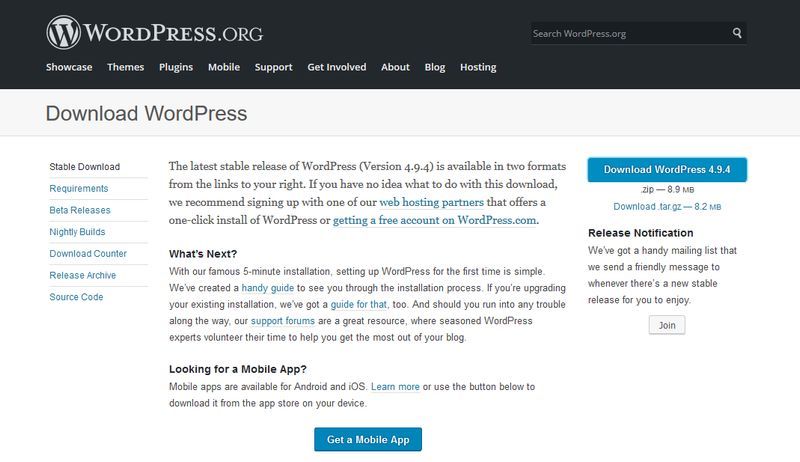
Download the latest version of WordPress, unzip it, and delete the wp-content folder and the wp-config-sample.php file from it. You need to delete the wp-content folder from the new install because you don’t want to replace wp-content on your server, as it contains all your media files. And, you need to delete wp-config-sample.php, as it can mess up with your existing server configuration.
Before you start uploading the new version, create a security copy of the current version by downloading the contents of the public_html folder through an FTP client to your local machine.
When you are done, upload the new version of WordPress you have just stripped of wp-content and wp-config-sample.php to your server. Wait until the upload ends, then reload your site in the browser. If the error message is still there empty the browser cache and try it again.
5. CHECK YOUR DATABASE SERVER
Finally, an unresponsive database server can also be the reason for the error. This frequently happens on websites that use a shared hosting solution, as another site on the same server may temporarily use too many database resources. If this is the case it has a good chance that your host is already working on the problem. You can also contact their support team and ask about the health of your database server.